Creating a garden plan with Post-it® Notes: How to make the most of your spring planting
While most of the work of gardening happens in the spring and summer, one of the most creative (and, for some, the most fun) parts of gardening is best done in fall and winter. Arranging and planning a garden is like a dream come true – a way to express your grand vision of a garden before you have to start on any of the hard work. But it's more than just a dream – creating a clear, detailed garden plan is the best way to make the most of your yard space.
-
1. Sketch your plot
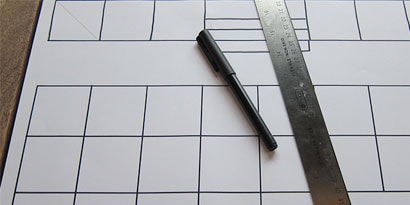
The first step is to make a scale drawing of the area you're going to plant in. It may be a simple square or rectangle, but you may also need to sketch in curves or odd shapes, if you're planting in raised beds or around buildings and structures. Start with a simple grid system that will fit on the sheet of paper you're using (a one foot to one inch scale often works well, unless you're working with very large beds – whatever your space, find a scale that works for you). Once you've got your grid laid out, adding a square or rectangular bed is simple. If you're working with a curved bed, sketch out a square or rectangle that can accommodate the whole shape, then use the gridlines to help you draw in the curves – a simple diagonal line though the center of one or more squares will act as a good guideline for any curve you need to draw.

-
2. Label Post-it® Notes with what you want to grow
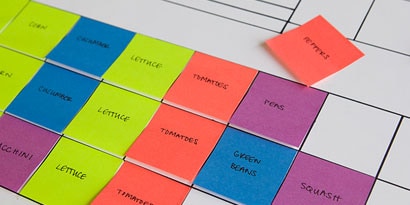
Collect some 2x2 Post-it® Super Sticky Notes in different colors, and label each color with the name of a plant you'd like in your garden. Create enough labeled notes for each plant to represent roughly the ratios you'd like in your garden. (If what you want to plant is quite small, each note can represent multiple plants, a small bed, or a particular arrangement of plants, as necessary.)

-
3. Design your garden
Take your labeled notes and place them into your available plots. Arrange and rearrange as you see fit, until you've used the space you've got in the best possible way. Don't forget to account for the area each plant needs to grow and expand, or for special cases where a plant needs extra sun or a particular kind of soil.

-
4. Use your plan as a guide for spring
When you've got your plan finalized, you can use it to create a schedule for making purchases, deciding on planting dates and starting seeds indoors over the winter. Or, if you're waiting until spring to get started, keep your plan handy and use it to daydream about the bounty of the coming season.

